Top-Rated Concrete Sealers for Long-Lasting Protection and Durability

Garage Grind+Stain+and+Seal
+Piedmont+SC


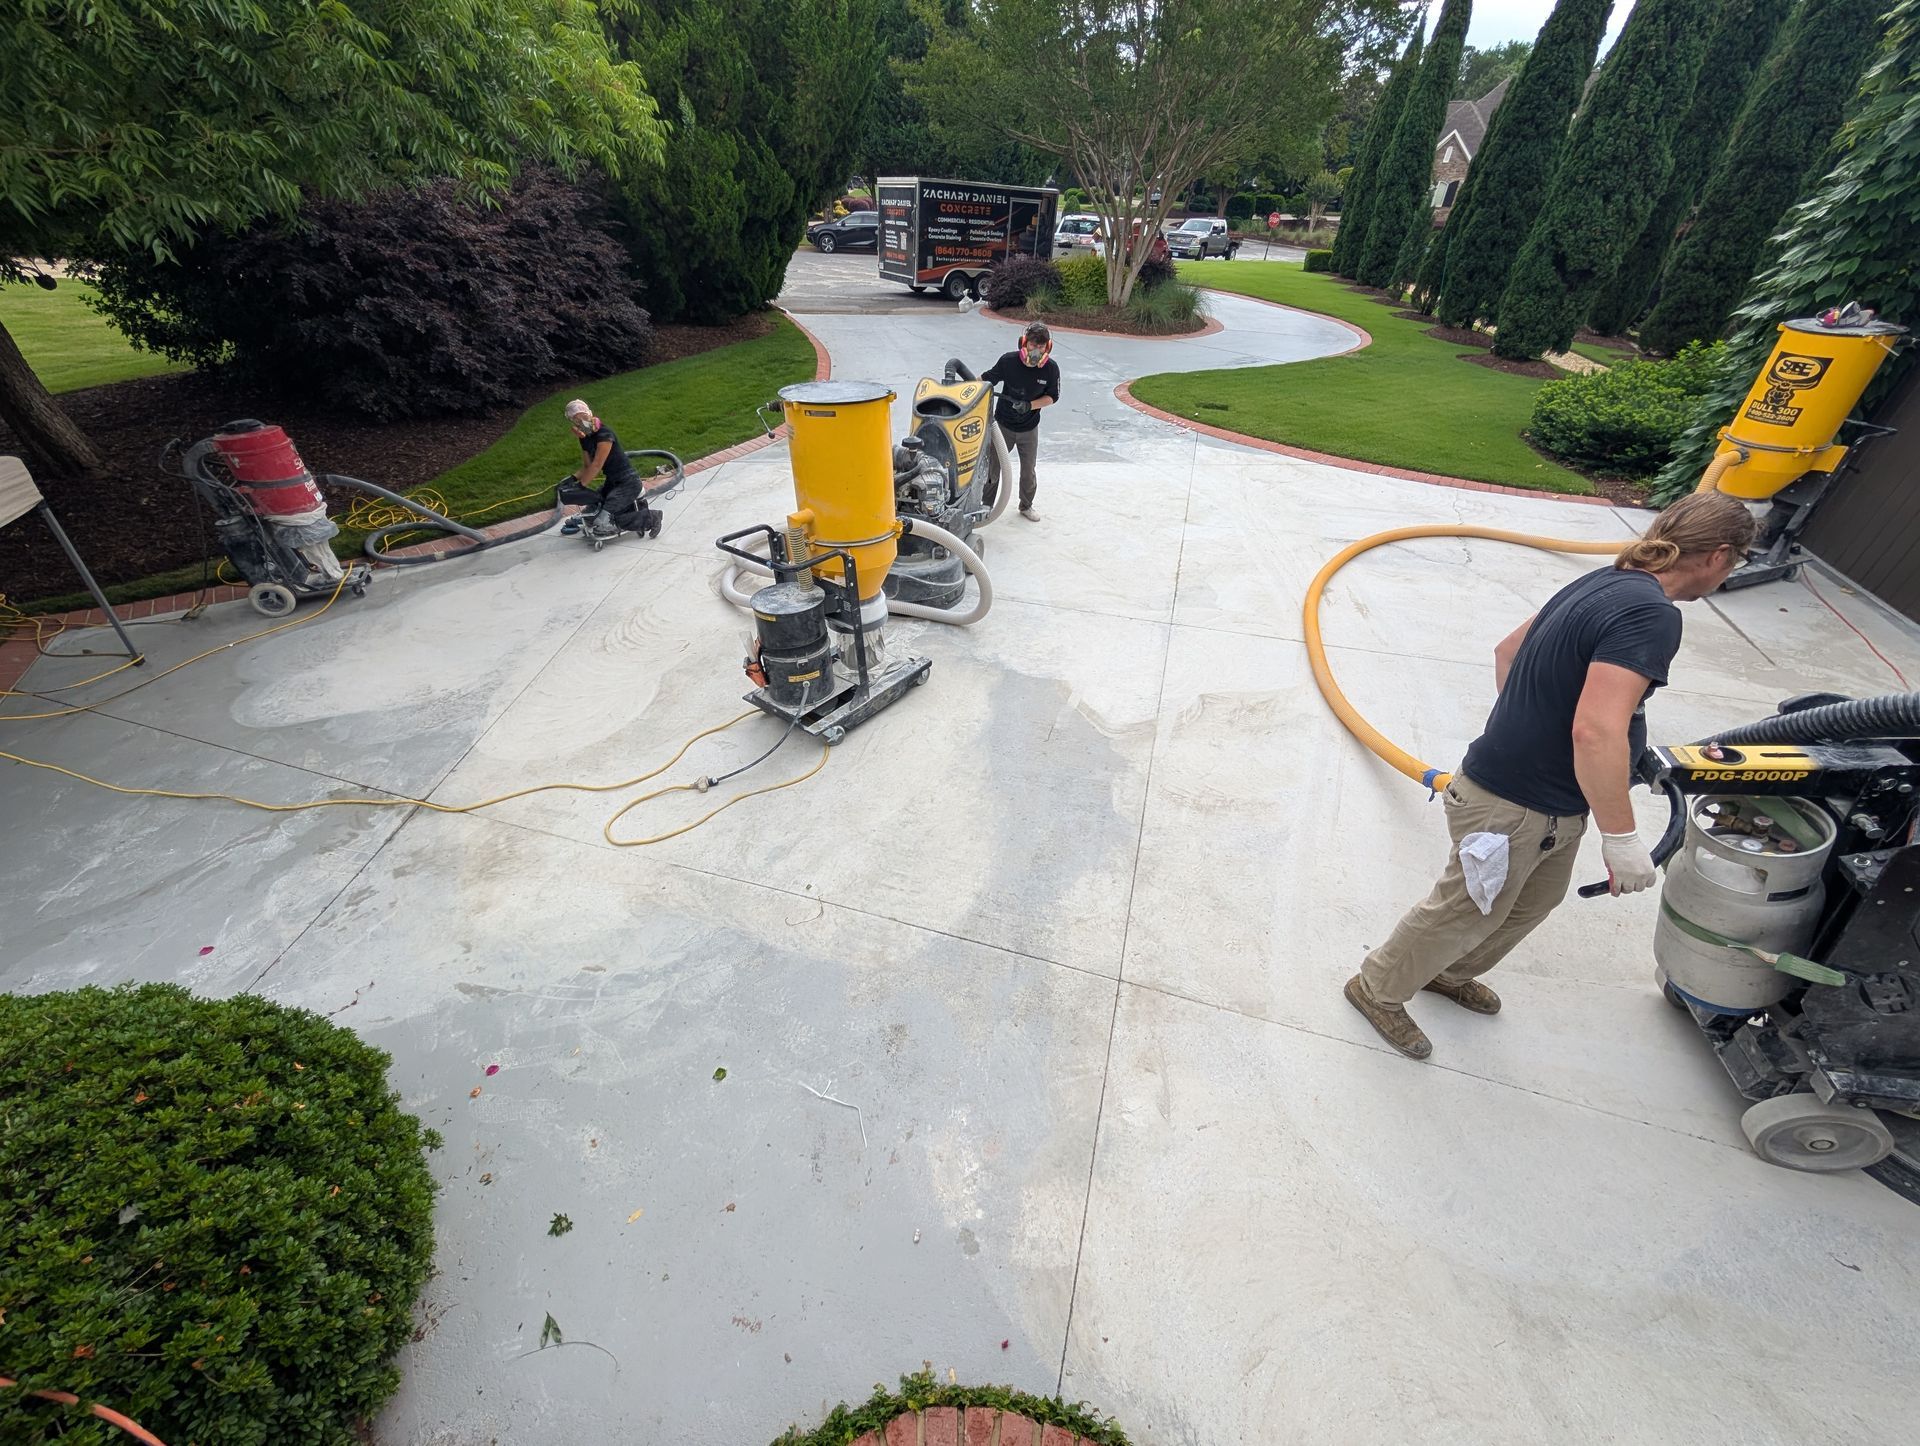
Before choosing a sealer, make sure your concrete surface is properly coated and prepped. If you’re in Upstate South Carolina, our concrete coatings in Greenville, SC service ensures your floors are professionally finished for maximum sealer performance.


1. Foundation Armor AR350 Wet Look Concrete Sealer

A bucket of foundation armor ar350 concrete and masonry sealer
The Foundation Armor AR350 Wet Look Concrete Sealer is a top-rated concrete sealer for enhancing and protecting your concrete surfaces. This solvent-based acrylic sealant offers a wet-look finish, making dull surfaces shine. Perfect for driveways, stamped concrete, and patios, it enhances faded color while providing excellent waterproofing.

Key Features:

  • Breathable and non-yellowing formula 
  • Enhances faded color with a low-gloss finish
  • Works on precast concrete, brick, and other surfaces

Coverage:

Surface Type Coverage Area (per gallon)
Porous Surfaces 175 square feet
Smooth Surfaces 200-225 square feet

Pros and Cons: 


Pros:

  • Easy to apply with a roller or sprayer
  • Exceptional resistance to water damage, mildew, and stains
  • Lasts 3 years outdoors and 7 years indoors

Cons:

  • Requires two coats for best results


In testing, the AR350 resisted harsh chemical substances, efflorescence, and abrasion, maintaining durability in garage, sidewalk, and warehouse applications. Users reported it provided superior moisture resistance and made surfaces look vibrant.


2. MasonryDefender Concrete Driveway Sealer

A bottle of concrete driveway sealer on a white background

The MasonryDefender Concrete Driveway Sealer protects your driveway while maintaining its natural appearance. Its water-based silane/siloxane formula penetrates deeply to prevent moisture, salt, and stain damage.

Key Features:

  • Coverage: 90–150 square feet per gallon
  • Dries in 6 hours with no strong odor
  • Forms a strong barrier against water damage

Pros

  • Long-lasting solution for outdoor surfaces
  • Compatible with stamped concrete, sidewalks, and pavers
  • Resists deicing salts and efflorescence

Cons

  • Limited to outdoor use
  • Requires adhesion on clean surfaces to prevent contamination

MasonryDefender’s chemical resistance and durability make it an excellent option for long-term maintenance.


3. Ghostshield Siloxa-Tek 8500 Concrete Sealer
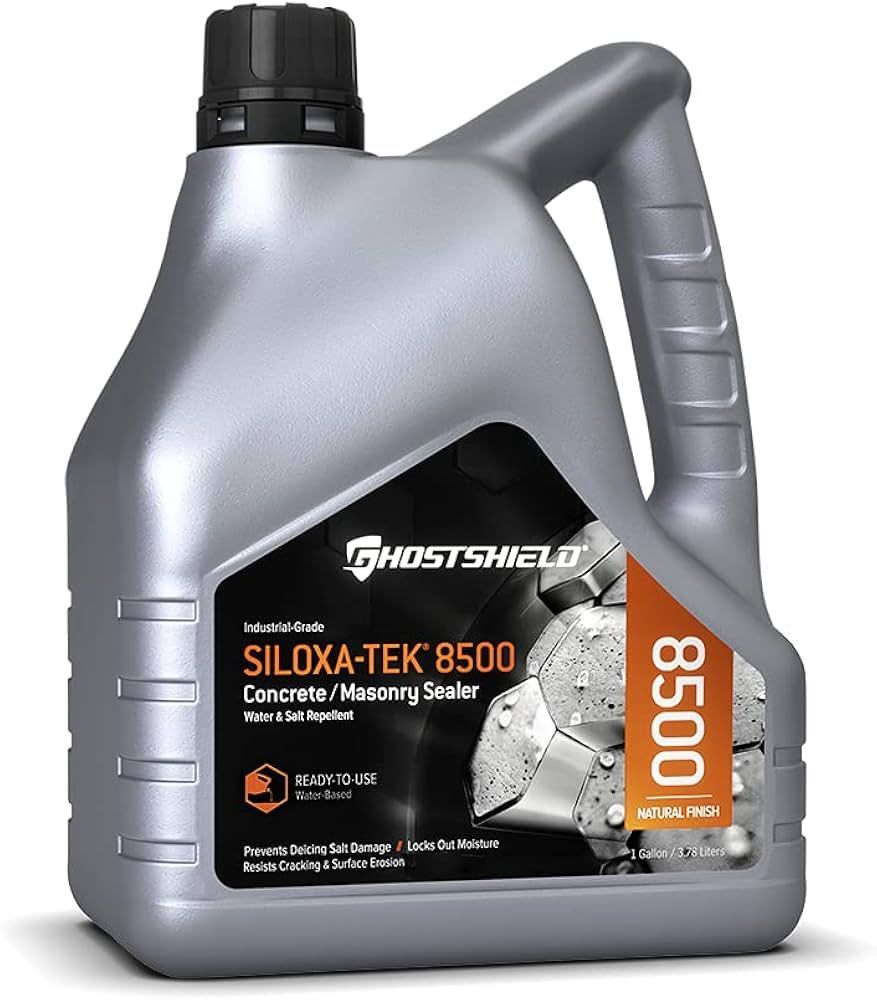
A bottle of siloxa-tek 8500 concrete / poisoning sealer

The Ghostshield Siloxa-Tek 8500 is an industrial-grade commercial concrete sealer. This penetrating sealant offers unbeatable protection against moisture, salt, and freeze-thaw cycles. Its silicate and siloxane blend reduces porosity for long-lasting adhesion and waterproofing.

Key Features

  • Cures in 24 hours with a clear, natural finish
  • Blocks mildew and mold growth
  • Repels oil, grease, and chemical reactions


Pros and Cons

Pros Cons
Protects against water and salts Slightly pricey compared to others
Can be applied with a brush, roller, or sprayer Somewhat long dry time
Dries clear, maintaining the concrete's look Requires two coats for best results


Application Tips

  • Clean and prep the surface using a pressure washer or detergent
  • Apply evenly with a pump sprayer, brush, or roller
  • Allow to dry fully before exposing to rain or humidity


This sealer para concreto is perfect for patios, sidewalks, and garage floors, maintaining durability against harsh weather and heavy wear.

4. Eagle Armor Seal Urethane Acrylic Concrete Sealer

A bucket of eagle armor seal clear concrete sealer

The Eagle Armor Seal Urethane Acrylic Concrete Sealer is a high-performance sealant offering a satin finish with a “wet look.” It protects against chemical resistance and heavy wear in areas like basements, kitchens, and garage floors.

Key Features

  • Durable polyurethane coating for added strength
  • Covers 175–225 square feet per gallon
  • Compatible with pavers, brick, and decorative concrete

Pros

  • Can be tinted for unique color options
  • Resists abrasion, mildew, and efflorescence
  • Quick curing process ensures minimal downtime

Cons

  • Can be slippery when wet; add a non-slip additive for safety


This concrete sealer is a trusted choice for home improvement projects and building professionals alike.

For those looking to maintain their concrete surfaces, Zachary Daniel Concrete recommends this product for its durability and ease of use.

5. TotalBoat TableTop 1-Gallon Epoxy Resin Kit

Two gallons of total boat tabletop epoxy sitting next to each other

Key Features:

  • Penetrates deeply into cement and other substrates
  • Blocks mildew, moisture, and water damage
  • Safe for skin and environmentally friendly

Pros

  • Long-lasting, up to 10 years
  • Ideal for high-traffic areas like walkways and patios

Cons

  • Emits a noticeable odor during application

Product Specifications

Feature Details
Ease of Use Moderate
Coverage Area 12.8 sq ft at ⅛ inch thick, 6.4 sq ft at ¼ inch thick
Type Epoxy resin

6. Seal-Once Nano + Poly Concrete and Masonry Sealer
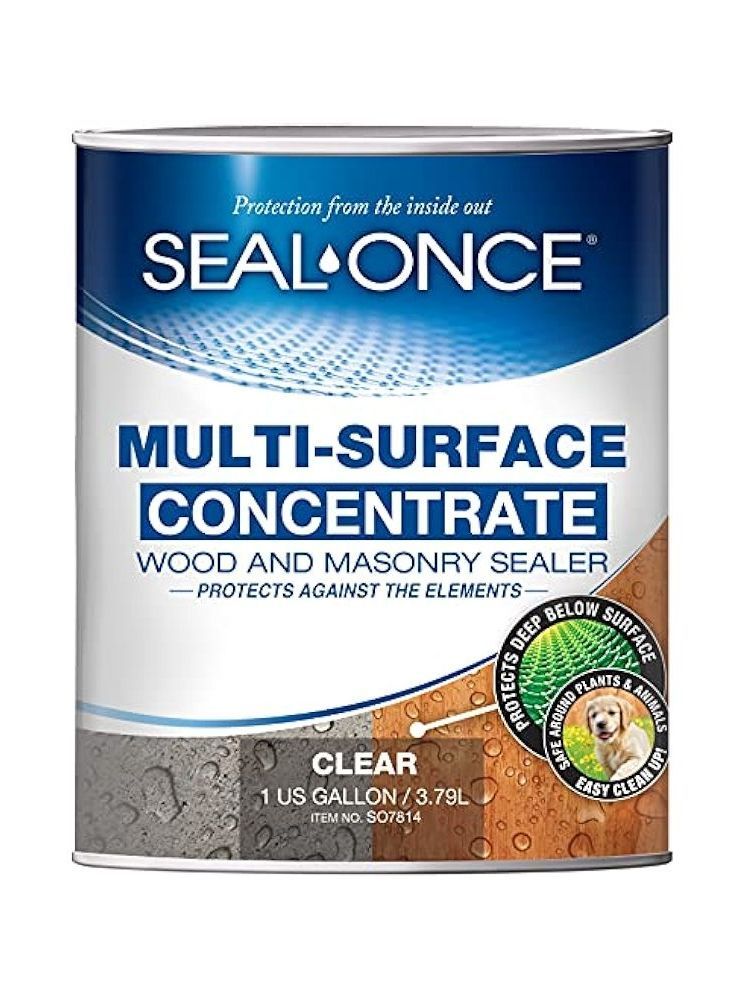
A can of seal once multi surface concentrate wood and masonry sealer.

The Seal-Once Nano + Poly Concrete and Masonry Sealer is a top-rated concrete sealer for protecting your surfaces. This eco-friendly sealant is safe for kids and pets once dry. Using advanced nanotechnology, it penetrates deeply into cement and masonry, forming a strong barrier against water and moisture. Ideal for decks, patios, and sidewalks, it’s designed to prevent water damage, mildew, and abrasion.

Key Features


  • Long-lasting protection against cracking, spalling, and efflorescence
  • Shields against UV (ultraviolet) rays to preserve color
  • Provides a waterproofing layer to prevent evaporation and damage


Pros and Cons

Pros Cons
Environmentally friendly formula Emits some odor during application
Clear finish that doesn’t yellow Not suitable for natural stone
Durable and lasts up to 10 years Takes 48 hours to handle vehicle traffic


The Seal-Once Nano + Poly Concrete and Masonry Sealer is a top-rated concrete sealer for protecting your surfaces. This eco-friendly sealant is safe for kids and pets once dry. Using advanced nanotechnology, it penetrates deeply into cement and masonry, forming a strong barrier against water and moisture. Ideal for decks, patios, and sidewalks, it’s designed to prevent water damage, mildew, and abrasion.

7. EcoProCote Eco-Tuff Clear Coat Polyurethane Sealer

A can of eco-tuff clear coat is gloss sheen.

The EcoProCote Eco-Tuff Clear Coat Polyurethane Sealer is a bio-polyurethane sealant designed to protect decorative concrete surfaces. Safe for indoor and garage use, it’s free of harmful odors and volatile organic compounds, making it an excellent choice for those seeking environmentally friendly options.

Key Features

  • Coverage: 1 gallon protects 300–400 square feet
  • Available in matte, satin, and gloss finishes
  • Dries within 30–60 minutes between coats

Pros

  • Exceptional resistance to chemical substances, water, and abrasion
  • Can be used on kitchen floors, basements, and stucco
  • Reduces surface porosity to prevent mold and dust

Cons

  • Requires multiple coats for full protection
  • Coverage may vary based on substrate condition and humidity


This sealer provides a clear finish, allowing polished concrete and other surfaces to maintain their natural appearance while standing up to grease, dirt, and corrosion. Apply with a broom, roller, or pump sprayer for easy use.

8. Foundation Armor SX5000 Penetrating Concrete Sealer

A bucket of foundation sx5000 clear matte concrete and masonry sealer.

The Foundation Armor SX5000 is a commercial concrete sealer designed to protect against moisture, salt, and chemical reaction damage. Using a water-based silane/siloxane formula, this sealant penetrates deeply into cement to form a durable, breathable barrier.

Key Features

  • Reduces absorption by 95%, preventing water damage
  • Compatible with stamped concrete, driveways, and sidewalks
  • Lasts up to 10 years with minimal maintenance

Pros

  • Allows trapped moisture to escape, avoiding surface contamination
  • Approved for use by the U.S. Government
  • Resists deicing salts and efflorescence

Cons

  • Application requires a garden sprayer or similar equipment
  • Emits some volatile organic compounds during use

Application Tips

  1. Clean the surface with a detergent or by pressure washing.
  2. Use a roller or sprayer for even coverage.
  3. Allow full curing before exposure to rain, oil, or vehicle traffic.

9. Rocklinite Labs Tuff Duck Concrete Countertop Sealer

A bottle of tuff duck is sitting on a white surface.

Rocklinite Labs Tuff Duck Concrete Countertop Sealer is an excellent choice for sealing countertops and kitchen surfaces. It provides strong protection against stains, moisture, and everyday wear.

Key Features

  • Water-based formula with low volatile organic compounds
  • Covers up to 160 square feet per quart
  • Provides a semi-gloss finish that enhances color without overwhelming it

Pros

  • Durable against grease, soap, and calcium silicate deposits
  • Easy to apply with a microfiber pad or roller
  • Compatible with cement, stone sealer, and plastic

Cons

  • Not suitable for application with a brush
  • Limited to smaller surface areas


When tested on unsealed concrete, this sealer para concreto resisted red wine and acid spills, making it perfect for high-use areas.

10. BEHR Premium Wet Look Concrete Sealer

A bottle of behr premium wet look sealer for concrete , rock and tile.

The BEHR Premium Wet Look Concrete Sealer enhances decorative concrete, brick, and pavers with a high-gloss finish that looks freshly wet. Suitable for driveways, patios, and garage floors, it protects against moisture, mold, and UV exposure.


Key Features

  • Coverage: 200–450 square feet per gallon
  • Provides long-lasting waterproofing and chemical resistance
  • Safe for use on solid and clay surfaces

Pros

  • Restores faded color and vibrancy
  • Creates a protective adhesive layer for better durability
  • Withstands exposure to heat, rain, and pressure

Cons

  • Can be slippery when wet; consider a wax or non-slip additive
  • Multiple coats may be required for uneven substrates

Application Tips

  • Ensure proper ventilation when applying indoors.
  • Use a pump sprayer or roller for even coverage.
  • Refer to the safety data sheet and wear appropriate personal protective equipment, such as gloves and a respirator.


For added protection, consider pairing this sealant with a primer or concrete densifier for enhanced surface strength. If you’re looking for a reliable way to protect your deck, warehouse, or roof, the BEHR Premium Wet Look Concrete Sealer delivers exceptional longevity.

11. Foundation Armor SX5000WB Concrete & Masonry Sealer

A gallon of foundation sx5000m3 clear / white concrete and masonry sealer.

Foundation Armor SX5000WB is a top-rated concrete sealer designed for protecting concrete and masonry surfaces. This penetrating sealant withstands harsh weather conditions, offering excellent waterproofing through its water-based silane/siloxane blend. Ideal for maintaining the natural look of concrete, it does not alter the porosity or color of the surface.


Key Features

  • Water-resistant: Protects against moisture and freeze-thaw cycles, preventing water damage and efflorescence.
  • Long-lasting: Offers up to 10 years of protection before requiring reapplication.
  • Easy application: Can be applied using a pump sprayer for a uniform coat.


Pros and Cons


Pros Cons
Easy to apply with a sprayer Requires a pump sprayer for application
Does not change the look of concrete Only for unsealed surfaces
Excellent water repellency Some VOCs may be emitted after application

Customer Feedback:

Many customers appreciate the curing performance and how well it protects against stain, rain, and dust. It’s frequently used on driveways, patios, and warehouse floors due to its durability.

12. MasonryDefender Penetrating Concrete Sealer

A bottle of stamped concrete sealer on a white background.

MasonryDefender Penetrating Concrete Sealer is another top-rated concrete sealer that provides excellent protection without altering the surface appearance. Perfect for decorative concrete, sidewalks, and pavers, it offers reliable protection against water damage, grease, and abrasion.

Key Features

  • Creates a strong barrier against moisture, mildew, and freeze-thaw cycles.
  • Dries to an invisible finish, preserving stamped concrete patterns and color.
  • Applies easily with a brush or sprayer.


Performance:

When tested, this sealant demonstrated exceptional resistance to deicing salts, chemical resistance, and long-term durability. Power washing revealed minimal wear and tear even under extreme conditions.


Pros

  • Affordable compared to other sealers.
  • Long-lasting protection for precast concrete and other types of concrete.

Cons

  • Not suitable for indoor applications or basement floors.
  • Some users reported minor staining after improper maintenance.

13. Eco-Tuff Clear Coat Concrete Sealer

A bucket of eco-tuff clear coat in matte color

The Eco-Tuff Clear Coat Concrete Sealer is a bio-polyurethane sealant perfect for those seeking an environmentally friendly option. This acrylic resin formula dries clear, allowing the natural beauty of decorative concrete to shine while providing a durable protective layer against abrasion, UV rays, and chemical resistance.

Key Features

  • Covers 300–400 square feet per gallon.
  • Available in matte, satin, and gloss finishes.
  • Ideal for use on stucco, masonry, and cement.

Pros

  • Odorless and non-toxic; safe for skin contact and pet-friendly.
  • Exceptional resistance to dust, grout damage, and mold growth.
  • Reduces surface porosity, minimizing calcium silicate deposits.

Cons

  • Requires multiple coats for full protection.
  • Humidity and surface absorption can affect drying times.


This sealer is often applied in basements, kitchens, and bathrooms for its longevity and safety.


14. TotalBoat Concrete Coating Sealer

Two bottles of total boat penetrating epoxy resin part a cold weather formula

The TotalBoat Concrete Coating Sealer is a resin-based epoxy designed to provide a high-gloss finish. This two-part system creates a durable barrier against abrasion, corrosion, and chemical reaction damage. Perfect for concrete countertops, decks, and garage floors, it also withstands heat exposure.


  • Versatile Application: Suitable for multiple surfaces like concrete, ceramic, and stone.
  • High-Gloss Finish: Leaves a shiny, glass-like surface that enhances the look of your project.
  • Heat Resistance: Can withstand high temperatures, making it ideal for various environments.

Product Specifications

Feature Details
Formula Epoxy
Quantity One gallon
Application Type Two-part application
Coverage 12.8 square feet

Pros

  • Stands up to heavy tire traffic and adhesion challenges.
  • Enhances color vibrancy while resisting efflorescence.

Cons

  • Covers less area than some competitors.
  • Requires precise mixing and careful application using a broom, roller, or sprayer.


In summary, TotalBoat Concrete Coating Sealer is an excellent option for those seeking a reliable and attractive finish for their surfaces. It stands out for its stain, yellowing, and scratch resistance, ensuring long-lasting protection against wear and tear.

15. Foundation Armor Sealer
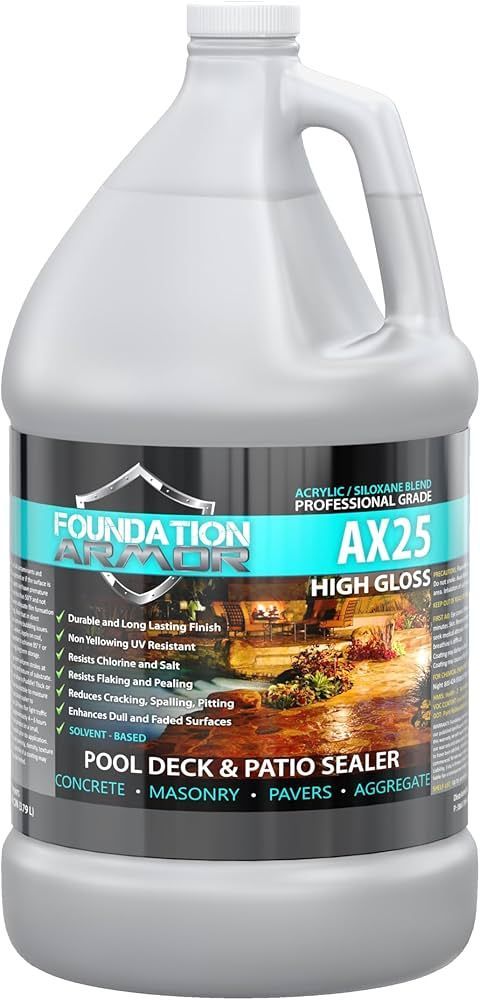
A gallon of foundation ax25 high gloss pool deck and patio sealer.

The Foundation Armor Sealer is a polyurethane sealant designed for use on both sealed and unsealed surfaces. Known for its durability and ease of application, it’s a popular choice for driveways, sidewalks, and concrete slabs.

Key Features

  • Offers long-lasting protection against mildew, moisture, and chemical substances.
  • Dries to a satin or low-gloss finish, enhancing stamped concrete and pavers.
  • Suitable for use in garage floors, deck areas, and building exteriors.
Feature Details
Type Acrylic
Coverage Area 175-225 square feet per gallon
Dry Time 24 hours
Recoat Time Every 3-7 years


Customers frequently highlight its effectiveness in preventing slip hazards while preserving the natural look of masonry. Refer to the safety data sheet for detailed instructions and use appropriate personal protective equipment, including gloves and a respirator.


16. Rust-Oleum EpoxyShield Concrete Floor Coating

A can of rust oleum epoxy shield floor paint.

The Rust-Oleum EpoxyShield is a resin-based epoxy designed to protect concrete floors in high-traffic areas. Known for its durability, it provides a glossy finish while forming a solid barrier against abrasion, chemical reaction, and corrosion.

Key Features

  • Easy to apply with a brush or roller.
  • Dries to a high-gloss finish, enhancing the look of garage floors.
  • Resists oil, grease, and dirt.

Pros

  • Long-lasting protection in warehouses and industrial settings.
  • Compatible with acrylic resin coatings for enhanced chemical resistance.

Cons

  • Not suitable for outdoor applications like decks or patios.
  • Limited coverage per quart compared to competitors.

17. Quikrete Concrete Sealer

A yellow bottle of quikrete high gloss sealer

The Quikrete Concrete Sealer is a versatile option for protecting pavers, stamped concrete, and concrete slabs. Its film-forming formula creates a protective wax-like layer, enhancing surface adhesion and minimizing contamination.


Key Features

  • Covers 200–450 square feet.
  • Dries in just 1 hour, offering quick protection.
  • Leaves a glossy finish ideal for patios and driveways.

Application Tips

  • Apply two coats using a roller, brush, or pump sprayer.
  • Avoid exposure to heavy traffic or rain for at least 24 hours.
  • Clean regularly with soap and water to maintain longevity.

Considerations

  • Can be slippery when wet; consider adding a silicone-based additive for better grip.
  • Protects against calcium silicate hydrate deposits and UV damage.


The Quikrete Concrete Sealer is a trusted option for residential and commercial applications, ensuring surfaces remain durable and vibrant for years.


18. Valspar Wet Look Concrete Sealer

A bucket of valspar high gloss sealer wet look

The Valspar Wet Look Concrete Sealer is an acrylic-based product that gives your concrete a shiny, wet appearance. This sealer is perfect for reviving dull or faded concrete surfaces. You can even add a tint to change the color of your concrete if you wish.


Here are some key features of the Valspar Wet Look Concrete Sealer:


  • Type: Film-forming
  • Coverage Area: 175-225 square feet
  • Dry Time: 24 hours
  • Gloss Level: Satin/wet


When using this sealer, keep in mind that it can be a bit slippery when wet. To improve safety, especially in areas like pool decks, consider adding a non-slip additive. This product works best on poured or stamped concrete and should not be used on brick or natural stone surfaces.

Application Tips


  1. Apply in the evening for best results.
  2. Allow it to cure for 48 hours before walking or driving on it.
  3. Use a roller or sprayer for application, but be prepared for a more complex process than some other sealers.


Overall, the Valspar Wet Look Concrete Sealer is a great choice for enhancing the appearance of your concrete while providing protection against water and salt damage. Just remember to follow the application instructions carefully for the best results.

19. Drylok Concrete Floor Paint

A can of drylok concrete floor paint in dover gray

Drylok Concrete Floor Paint is a popular choice for those looking to protect their concrete surfaces. Customers say the Drylok concrete floor paint offers excellent coverage and ease of application, often requiring only one or two coats for optimal results. This paint is designed to withstand various conditions, making it suitable for both indoor and outdoor use.


Key Features

  • Water-resistant: Protects against moisture and spills.
  • Durable: Withstands wear and tear from foot traffic.
  • Easy to apply: Can be used with a brush or roller.


Pros and Cons:

Pros Cons
Excellent coverage Needs to be applied with a pump sprayer
Dries to an attractive sheen Can only be applied to unsealed concrete
Protects against damage


Application Tips


  1. Ensure the surface is clean and free of any previous coatings.
  2. Use a pump sprayer for even application.
  3. Allow adequate drying time before exposing to foot traffic.


In summary, Drylok Concrete Floor Paint is a reliable option for those seeking a protective and aesthetically pleasing finish for their concrete surfaces. Its ease of use and durability make it a top choice for homeowners and professionals alike.

20. Zinsser Watertite Concrete & Masonry Sealer

A bucket of zinsser watertite hydraulic cement for concrete and masonry

Zinsser Watertite Concrete & Masonry Sealer is a top choice for those looking to protect their concrete surfaces. This sealer is known for its excellent waterproofing abilities, making it ideal for various outdoor applications.

Here are some key features:

  • Water-resistant: It effectively repels water, preventing damage from moisture.
  • Temperature protection: It withstands extreme weather conditions, ensuring durability.
  • Appearance: The sealer dries clear, maintaining the natural look of the concrete.


However, there are a few things to keep in mind:

  1. Application method: It needs to be applied using a pump sprayer for the best results.
  2. Surface preparation: Only unsealed concrete can be treated, so any previous coatings must be removed.
  3. Drying time: It dries to the touch in about 2 hours, but full protection takes longer.


Overall, Zinsser Watertite is a reliable choice for anyone looking to enhance the longevity of their concrete surfaces, especially in areas prone to moisture and temperature fluctuations.


21. Behr Premium Concrete Sealer
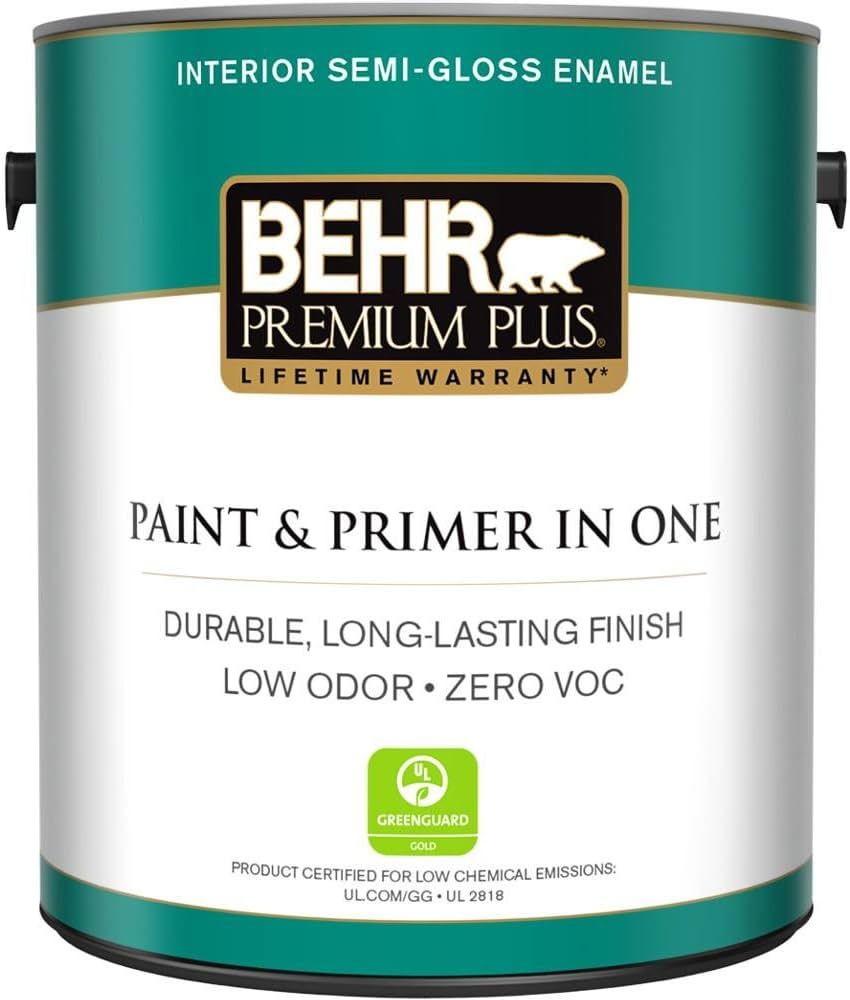
A can of behr premium plus paint and primer in one

BEHR Premium Wet Look Concrete Sealer is a top choice for those looking to enhance and protect their concrete surfaces. This sealer did a great job at revitalizing the color of our patio and sealing it to prevent further fade. It is easy to apply with the help of an HDX pump, making it a favorite among DIY enthusiasts.


Key Features

  • Safe for indoor and outdoor use
  • Versatile application on various surfaces like cement, stone, and brick
  • High-shine finish that restores vibrancy to dull surfaces


Pros and Cons:

Pros Cons
High gloss finish Can be slippery when wet
Easy to apply Requires 24 hours before foot traffic
Protects against UV rays Not ideal for pool decks


Application Tips

  1. Clean the surface thoroughly before application.
  2. Apply two coats for best results using a nylon brush or roller.
  3. Avoid walking on the surface for 24 hours after application.


This product is a bit pricier than some alternatives, but its performance and durability make it worth the investment. Whether you're sealing a driveway or a patio, BEHR Premium Wet Look Concrete Sealer is a reliable choice for long-lasting protection.

Customer Feedback

Many customers have shared their experiences with Armor All Concrete Sealer. Here are some highlights:


  • "This product is amazing! It was so easy to apply."
  • "The rain did not penetrate the concrete; it sat on top in little droplets."
  • "I found it impressive how it self-leveled within seconds to form a uniform coating."


In summary, Armor All Concrete Sealer is a great option for anyone looking to protect and enhance their concrete surfaces. Its ease of use and effective water resistance make it a top choice for both indoor and outdoor applications. Whether you're sealing a driveway or a patio, this product can help keep your concrete looking its best for years to come.


If you're looking to protect and enhance your concrete surfaces, check out the Zachary Daniel Concrete and more! This product is perfect for keeping your concrete looking great and lasting longer. Visit our website today to learn more and get a free estimate!

Conclusion

In summary, choosing the right concrete sealer is essential for keeping your surfaces safe and looking good. We tested various sealers to find the best options available. The Foundation Armor AR350 Wet Look Concrete Sealer stood out for its easy application and great protection.


Whether you need a sealer for your driveway, patio, or indoor surfaces, there’s a perfect choice for you. Remember to consider factors like durability, appearance, and safety features when making your decision. With the right sealer, your concrete can stay strong and beautiful for years to come.
 
October 28, 2026
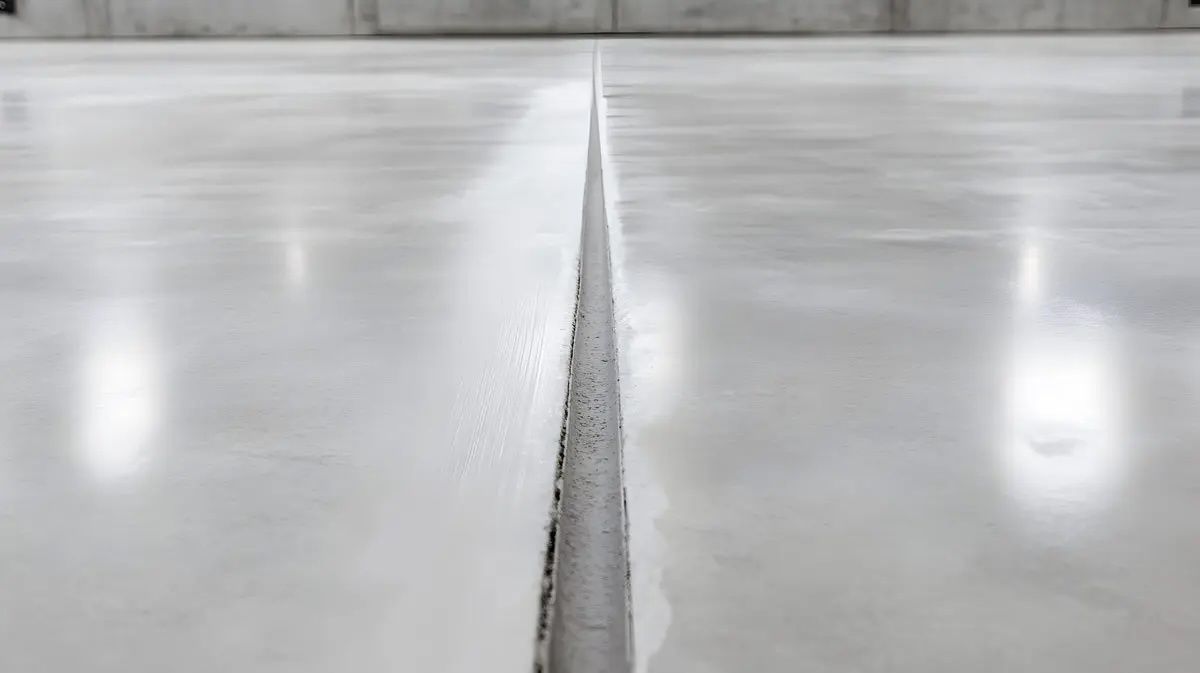
One of the first questions we get after a crack and joint filling job is how long it's actually going to hold. It's a fair question — the honest answer is that lifespan depends far more on which material was used and how well the joint was prepped than on any single number a contractor can promise upfront. Why There's No One Universal Answer A flexible exterior sealant exposed to Greenville's freeze-thaw cycles and constant UV lives a different life than a rigid epoxy filler installed inside a climate-controlled warehouse aisle. Traffic load, exposure to sun and moisture, and how the joint was prepped before filling all shape how long the work holds up — which is why we never give a blanket number without seeing the joint first. What Shortens Lifespan The single biggest factor in premature failure is skipped prep. Filling over old caulk, dirt, or loose concrete gives the new material nothing solid to bond to, and it works its way loose within a season regardless of how good the filler itself is. The second factor is using the wrong material for the environment — a flexible sealant in a high-load forklift aisle will compress and tear; a rigid filler on an exterior slab that moves seasonally will crack straight through. What Extends It Full removal of old material down to a clean joint, choosing a filler rated for the specific traffic and exposure conditions, and correct installation depth all meaningfully extend how long the work holds. This is the same standard we apply on every crack and joint filling project, whether it's a residential driveway or a commercial warehouse floor. Signs It's Time for a Refresh Filler that's visibly shrunk away from the joint edges, cracking along the filled line, or debris and water collecting in the joint again are all signs the material has reached the end of its service life. Catching it at this stage is a small job — waiting until the surrounding concrete starts chipping turns it into a bigger one, sometimes to the point where an overlay is needed to bring the surface back rather than a simple joint refill. Get a Straight Answer for Your Property If you're not sure whether your joints need attention or just want an honest read on what's left in the current filler, Zachary Daniel Concrete assesses joints across Greenville, Simpsonville, and the Upstate at no charge. Call Zach at (864) 770-8608 or request a free estimate .
October 14, 2026
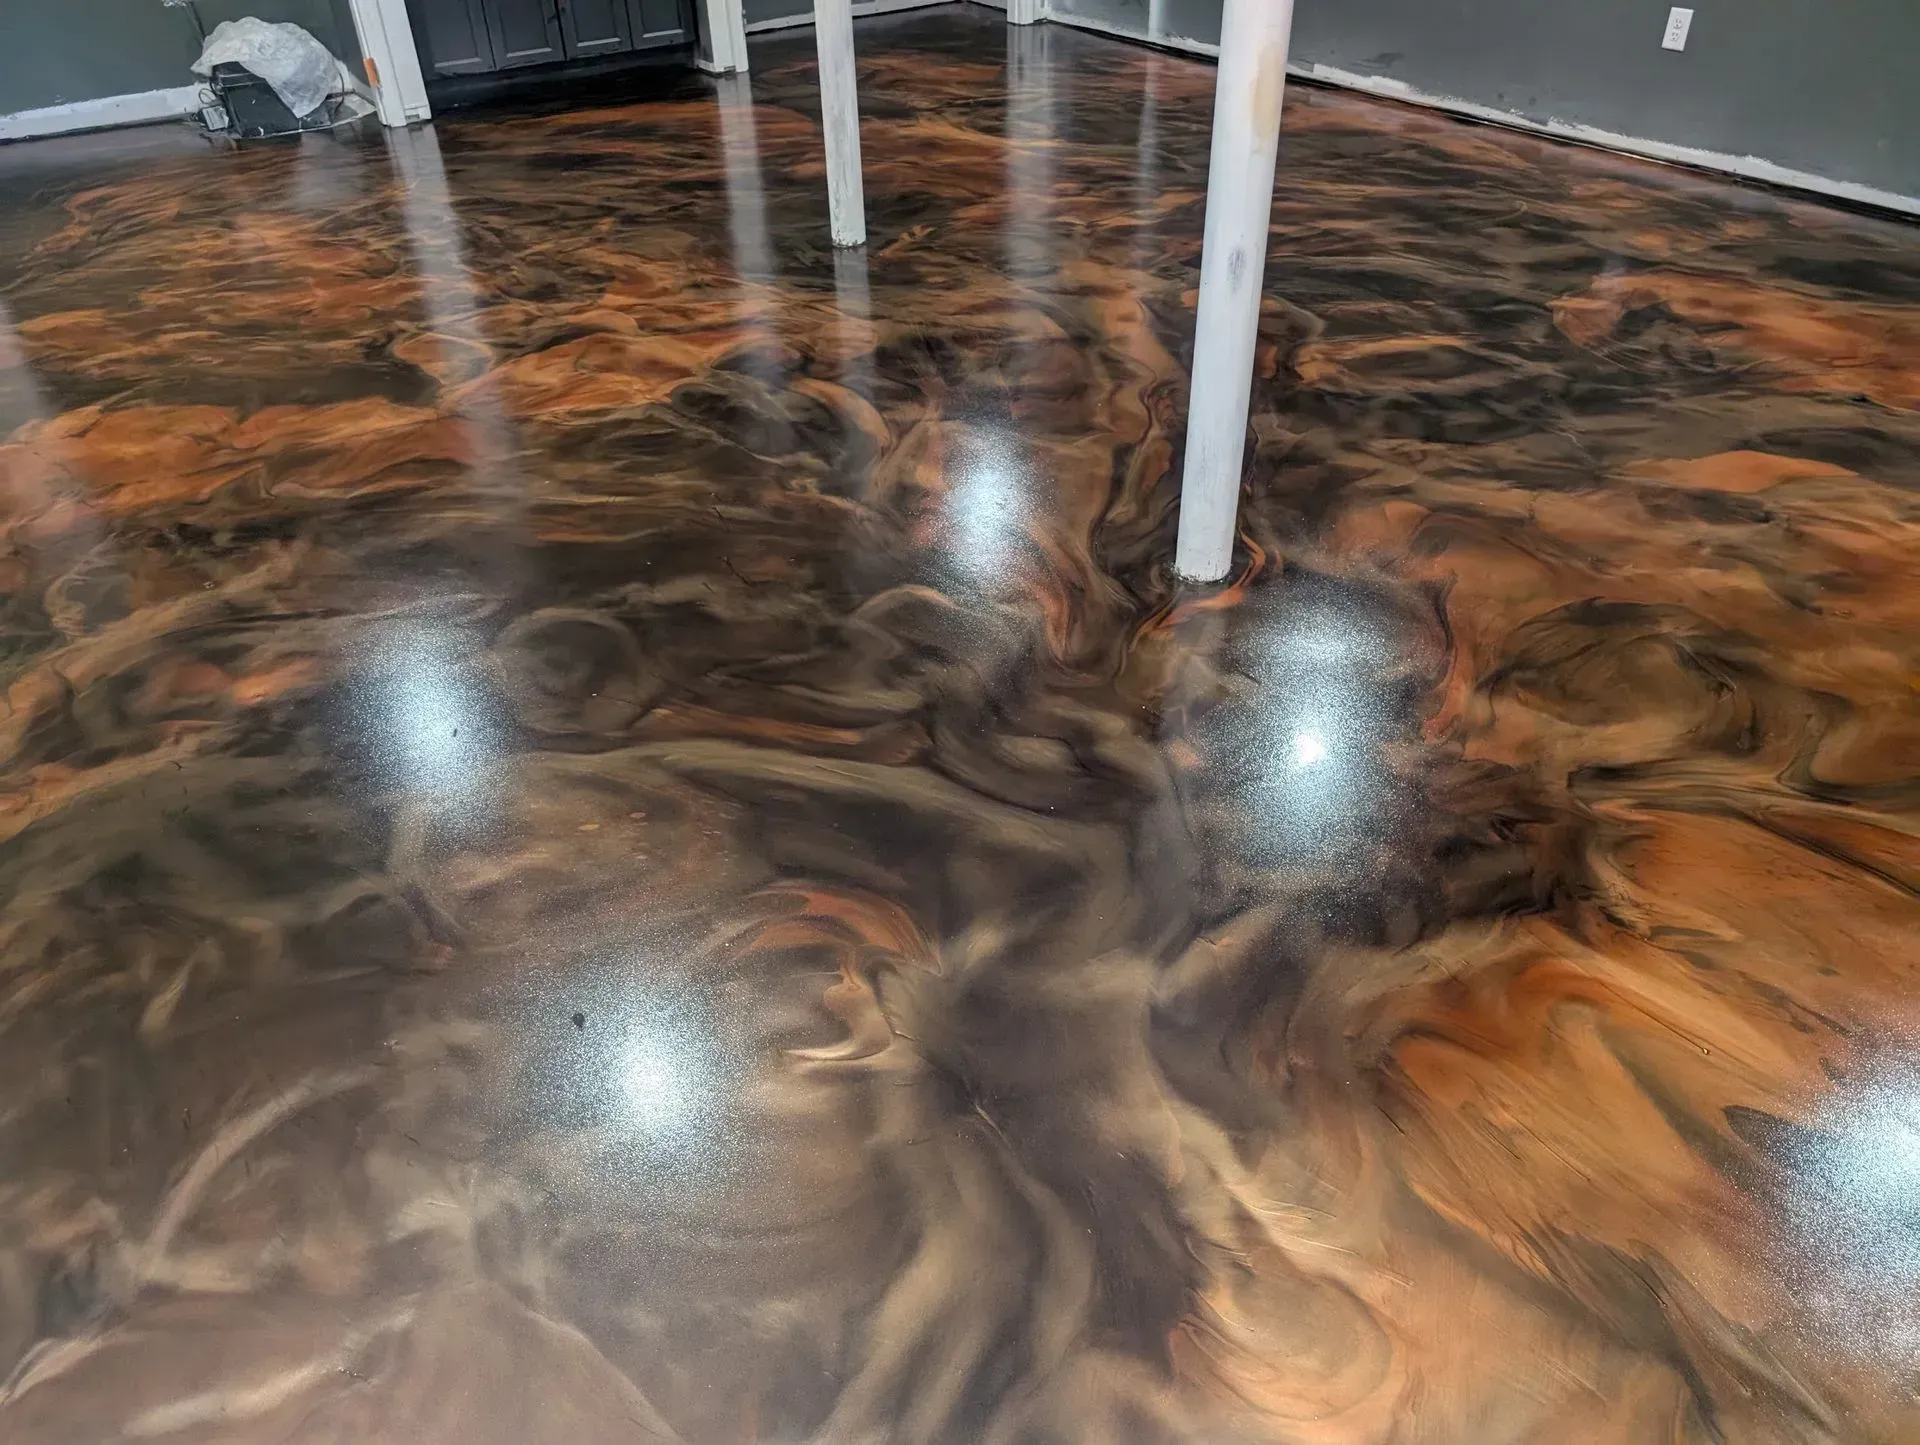
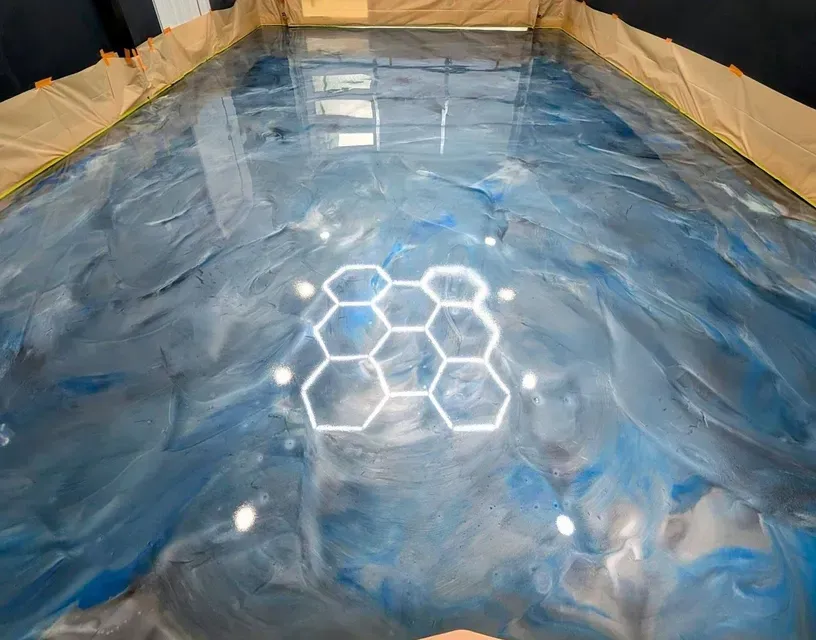
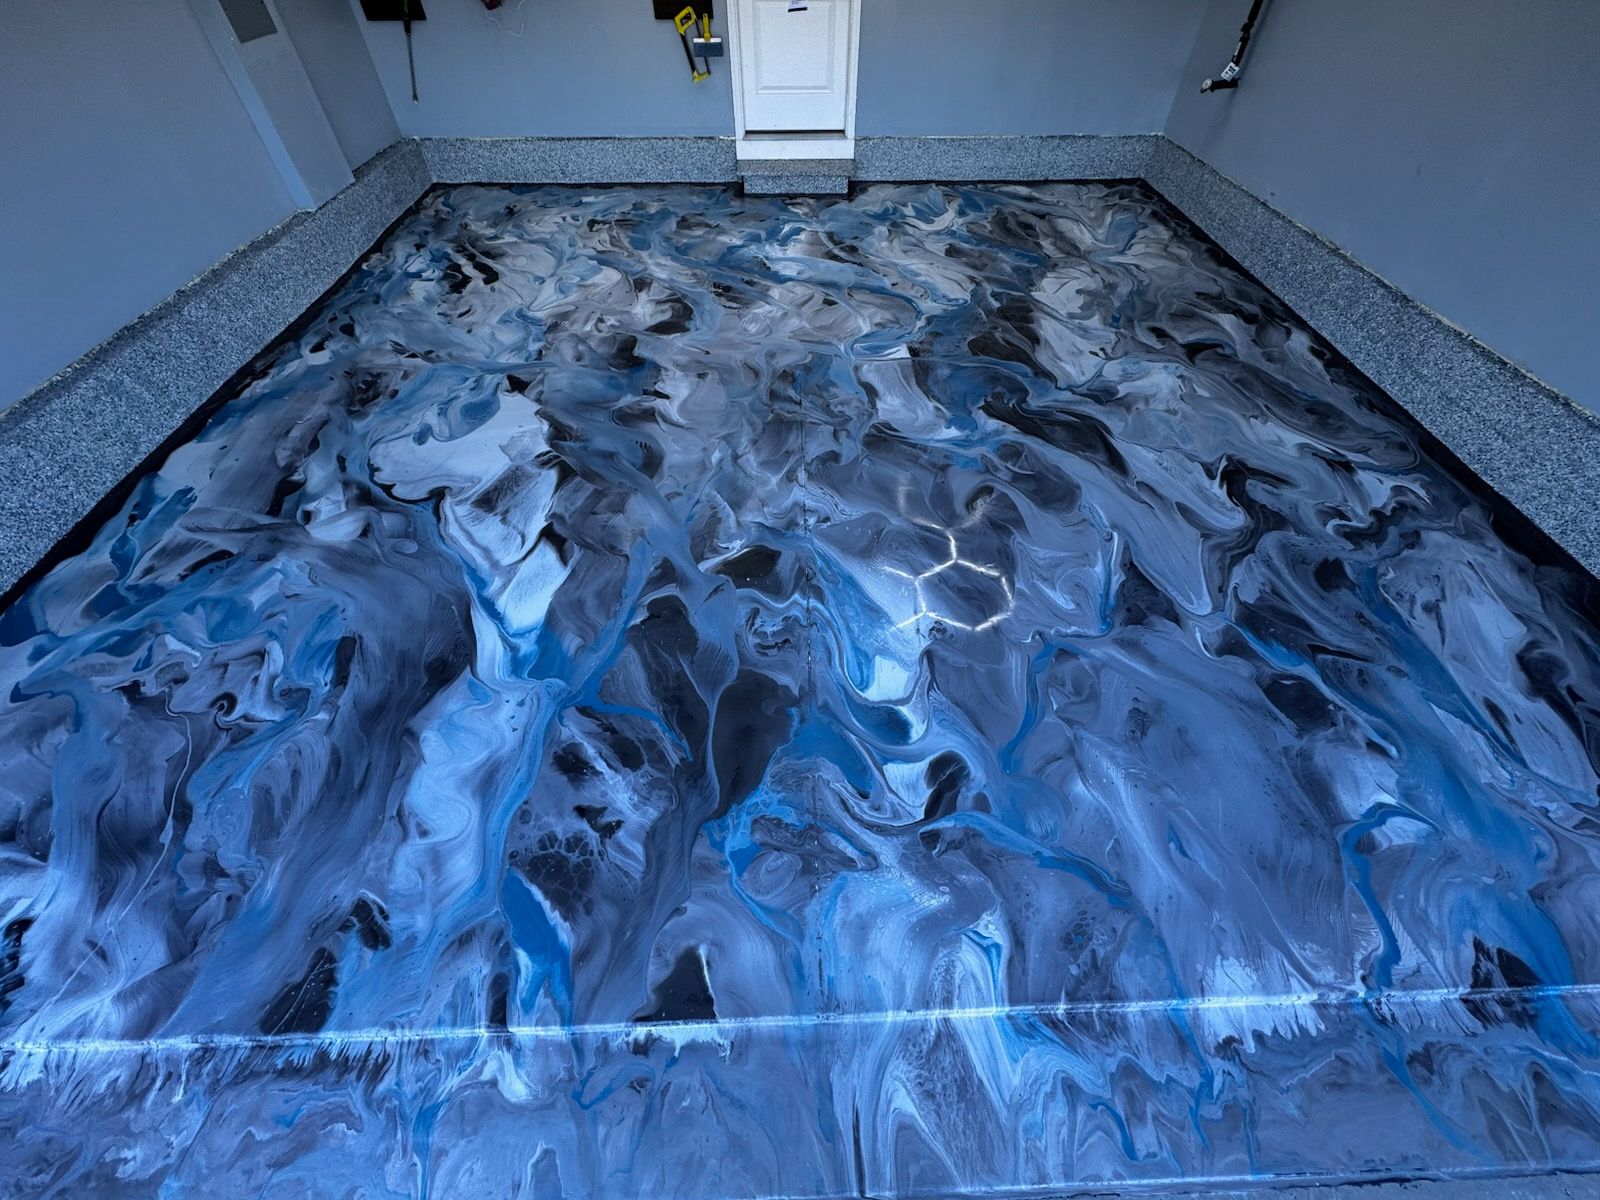
Homeowners browsing flooring options in Greenville often land on metallic epoxy photos and assume it's a color variant of standard epoxy flooring — a slightly fancier version of the same coating. It isn't. Metallic epoxy is a different material with a different application process, and the difference shows up in both the final look and the price. Standard Epoxy: Consistent and Durable Standard epoxy flooring uses a solid-color or flake-broadcast system that produces a uniform, predictable finish. It's the right choice for garages, basements, and commercial spaces where durability and consistency matter more than a unique visual effect. The color is mixed into the epoxy itself, so every batch and every section of the floor looks essentially the same. Metallic Epoxy: Movement and Depth Metallic epoxy uses metallic pigment powders suspended in a clear or tinted epoxy base. Because the pigments are lightweight and reflective, they move and cluster as the epoxy cures — creating a three-dimensional, marbled effect that looks different depending on the angle and light in the room. No two metallic epoxy floors look identical, even using the same color and the same installer, because the pigment movement can't be fully controlled. Why the Application Process Differs Standard epoxy is a more forgiving, repeatable process — mix, pour, spread, cure. Metallic epoxy requires more hands-on technique during the pour: the installer manipulates the material with tools, air, or targeted movement to encourage the pigment to form patterns rather than settle flat. This takes more time on-site and more experience to get a result that looks intentional rather than muddy. Cost and Where Each Makes Sense Because of the material cost and the skill required in application, metallic epoxy typically costs more per square foot than standard epoxy. It tends to make the most sense in spaces meant to be a visual feature — a showroom floor, a retail space, a finished basement, or a garage the homeowner wants to look like more than a garage. A recent example is a custom metallic epoxy garage floor we installed in Fountain Inn , built around a restrained black-and-silver design so the floor complemented the owner's car collection instead of competing with it. Standard epoxy remains the more practical choice for high-traffic industrial and commercial floors where uniform durability matters more than visual depth. Get a Recommendation for Your Space Not sure which fits your project? Zachary Daniel Concrete installs both across Greenville, Simpsonville, and the Upstate, and we'll walk you through which one makes sense for your space and budget. Call Zach at (864) 770-8608 or request a free estimate .
October 7, 2026
It's one of the most common questions we get from homeowners across Greenville, Simpsonville, Mauldin, and the Upstate: can this driveway be saved, or does it need to come out? The honest answer depends entirely on what's actually wrong with the slab underneath — not on which service happens to be more profitable for the contractor giving the quote. Here's the assessment framework we actually use at Zachary Daniel Concrete to make that call. What Resurfacing Covers When we talk about resurfacing, we mean finishing, coating, or overlaying the existing concrete — not pouring new. That includes grind and seal, stain and seal, concrete overlays , and driveway epoxy coatings . Each of these requires the underlying slab to meet a baseline condition — the question is always whether your driveway meets it. The Four Things We Check Structural integrity comes first: a driveway that's heaving, sinking, or actively shifting due to soil failure or tree roots can't be resurfaced, because any coating will crack as the slab keeps moving underneath it. Second, crack type and pattern — hairline cracks are typically fine, but through-depth structural cracks or active cracks that are still widening are a different story, and sometimes what looks like a crack problem is actually solved with concrete grinding alone. Third, surface condition — spalling, pitting, and old failed coatings are almost always fixable without replacement, as long as the damage hasn't gone past the surface layer. Fourth, moisture and drainage — a driveway with standing water pooling against its edge will keep failing any new finish until the drainage issue itself is addressed. When Resurfacing Makes Clear Sense If the slab is structurally sound, cracking is stable or limited to hairlines, surface damage is cosmetic, and drainage is manageable, resurfacing costs a fraction of replacement and can produce a better-looking result than new gray concrete — especially with an overlay or decorative finish. As we've written about before, floor restoration is often cheaper than most homeowners think , and the same logic applies just as much to driveways as it does to interior floors. When Replacement Is the Honest Answer If the driveway is actively heaving, has widespread rebar exposure, or the cost of prep and repair starts approaching the cost of new concrete, we'll say so directly — even when it means we're not the ones doing the next step. That's a better outcome than installing a system on a slab that isn't going to hold it.  Get a Free Driveway Assessment We walk every driveway before quoting anything — checking crack patterns, testing for hollow spots, and assessing drainage. The assessment is free across Greenville, Simpsonville, Mauldin, and the Upstate. Call Zach at (864) 770-8608 or request a free estimate to find out which option your driveway actually needs.
September 30, 2026
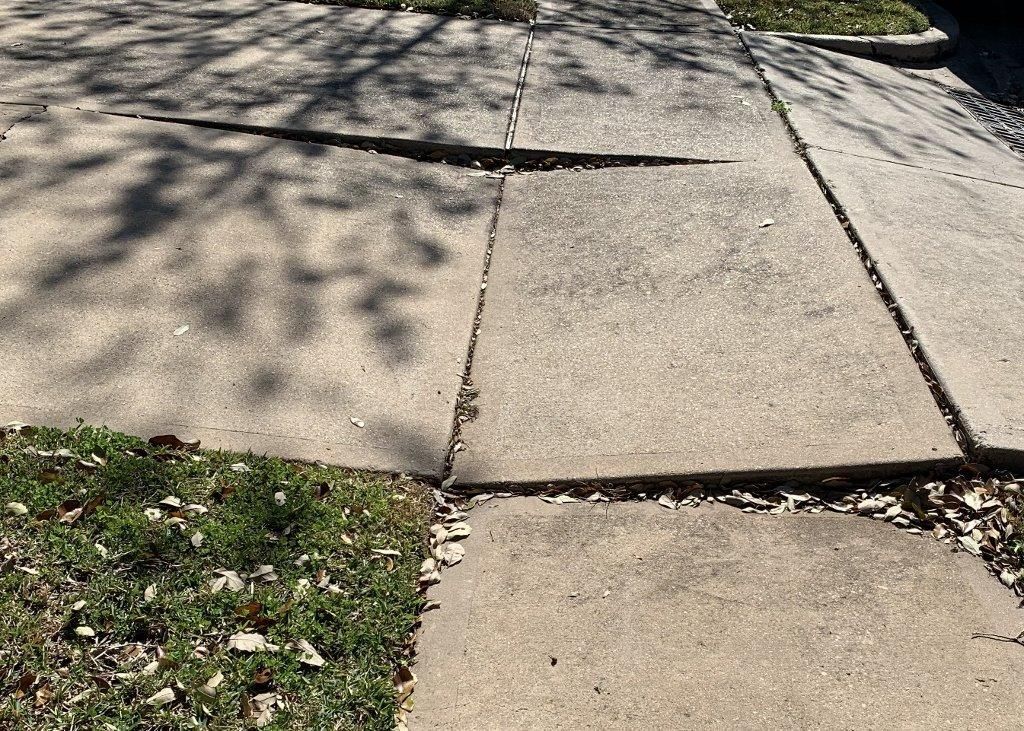
A quarter-inch lift between two sidewalk slabs doesn't look like much. It's also exactly the kind of edge that catches a shoe, a stroller wheel, or a delivery cart — and it's one of the most common liability issues we see on residential and commercial properties across Greenville and the Upstate. The good news: it's also one of the fastest and least expensive concrete problems to fix. Why Sidewalks and Driveways Lift Unevenly Concrete slabs shift for a handful of predictable reasons: tree roots growing beneath a walkway, soil settling unevenly after heavy rain, freeze-thaw cycles pushing sections at different rates, or simple age and traffic wear. Once two adjacent slabs are no longer flush, the raised edge becomes a permanent catch point until something is done about it. Most property owners assume the fix is replacing the slab. In the majority of cases, it isn't. What Trip Hazard Grinding Actually Involves Trip hazard grinding uses a specialized diamond grinding tool to shave down the raised edge until it's flush, or close enough to flush that it no longer presents a catch point. There's no demolition, no new concrete pour, and no multi-day cure time. In most residential and light commercial situations, we can assess and grind a trip hazard in a single visit, and the area is safe to walk on again as soon as we're done. This makes it a dramatically different scope of work than full slab replacement — both in cost and in how quickly the hazard is resolved. For a property owner facing a potential liability claim, the turnaround time matters as much as the fix itself. When Grinding Isn't Enough Grinding works when the height difference is within a manageable range and the slab underneath is stable. If a slab is still actively settling, or the height difference is too significant to grind down without compromising the slab's structural thickness, replacement becomes the more honest recommendation. This is part of our broader concrete grinding service — we'll tell you which situation you're in during the assessment, matching the fix to what the slab can actually support. For a full breakdown, see resurfacing vs. replacing your Greenville driveway. Where This Matters Most Trip hazard grinding is common on residential walkways and driveway aprons, but it's especially important for commercial properties, HOAs, and rental properties, where a documented, addressed hazard is meaningfully different from a liability sitting unaddressed. Property managers across Greenville, Simpsonville, and Mauldin call us specifically because a same-day fix means the property is covered without waiting weeks for a full concrete crew. Get a Trip Hazard Assessed If you've got a lifted sidewalk, driveway, or walkway edge on your property, Zachary Daniel Concrete can typically assess and grind it flush the same day. Call Zach at (864) 770-8608 or request a free estimate to get it handled before it becomes a claim.
September 23, 2026
Walk into most warehouses in Greenville, Spartanburg, or the Upstate and you'll see the same problem: floor lines that were sharp and yellow when they were painted, now faded to a dull gray or missing entirely in the highest-traffic aisles. Safety line marking isn't decoration. It's how a warehouse communicates traffic flow, hazard zones, and pedestrian paths without a single word — and when it fades, that communication stops working. Here's what OSHA actually expects, why lines fail faster than most facility managers assume, and what a professional re-marking job involves. What OSHA Actually Requires OSHA doesn't mandate one universal color code, but it does require that permanent aisles and passageways be marked and that hazards be identified with a marking method appropriate to the facility. In practice, most warehouses follow an informal but widely adopted standard: yellow for general traffic aisles and pedestrian paths, red for fire equipment and emergency zones, and other colors reserved for specific hazards like chemical storage or low-clearance areas. Consistency matters more than the specific palette — mixed or inconsistent marking across a facility creates confusion, which is its own hazard. Why Lines Fail Faster Than You'd Expect Standard striping paint isn't built for forklift traffic, pallet jacks dragging debris, or the constant abrasion of a working warehouse floor. In high-traffic aisles, ordinary paint can visibly degrade within months. Add a concrete floor that's never been properly sealed, and the paint has nothing solid to bond to in the first place — it wears down from underneath as much as from traffic on top. This is why we treat line marking as a floor system, not a paint job. The concrete needs to be clean, properly profiled, and free of old failed coatings before new lines go down, or the new marking fails on the same timeline as the old one did. What Professional Marking Involves Our safety line marking process starts with surface prep — grinding away old, failed paint and any surface contamination so the new coating has a clean bond. We lay out the traffic plan with the facility manager first: aisle boundaries, pedestrian walkways, staging areas, and hazard zones, using tape and chalk lines before anything permanent goes down. Then we apply a high-durability epoxy or polyurethane striping system rated for forklift and pallet jack traffic, which holds up significantly longer than standard striping paint in a working facility. Combining Line Marking With Floor Repair Faded lines are often a symptom of a bigger issue — cracked joints, spalled concrete, or a floor that's overdue for attention. We frequently pair line marking projects with crack and joint filling , since a floor with unaddressed cracks along a traffic aisle will keep chipping the new paint at the same failure points. Schedule a Warehouse Floor Assessment If your facility's lines are faded, missing, or inconsistent, Zachary Daniel Concrete provides safety line marking for warehouses and commercial facilities across Greenville, Spartanburg, and the Upstate. Call Zach at (864) 770-8608 or request a free estimate to get your facility back into compliance.
September 16, 2026
Most homeowners and facility managers don't think about control joints until they're staring at a crack that wasn't there last year. Joint filling is one of the least glamorous services we offer at Zachary Daniel Concrete — and one of the most important. It's cheap insurance against a much bigger repair bill down the road, and it's a step a lot of concrete work in Greenville, Simpsonville, Mauldin, and the Upstate skips entirely. Here's what control joints actually do, why they fail, and how to know if your slab needs attention now. What Control Joints Are For Concrete shrinks as it cures and moves slightly with temperature swings. Control joints are the intentional cuts placed in a slab to tell that movement where to happen — so the concrete cracks in a straight, planned line instead of a random spiderweb across your driveway, patio, or warehouse floor. The joint itself is a gap. Left empty, that gap collects water, dirt, and debris. Water that sits in a joint freezes in winter, expands, and pushes the slab edges apart. Dirt and debris in the joint create hard points that chip under vehicle or foot traffic. Over time, an unfilled joint stops being a control feature and starts being the source of the damage it was designed to prevent. Signs Your Joints Need Attention Cracking radiating out from the edges of an existing control joint Visible gaps where old caulk or sealant has shrunk, cracked, or pulled away Weeds or grass growing up through joints in a driveway or walkway Chipped or crumbling concrete along the joint edge Standing water collecting in the joint after rain Any one of these is worth a call. Left alone, they compound — a chipped joint edge collects more debris, which holds more moisture, which accelerates the chipping. What We Actually Do Our crack and joint filling process starts with removing the old, failed material — caulk, dirt, and any loose or spalled concrete — down to a clean, sound joint. We then install a flexible, semi-rigid, or self-leveling filler depending on the joint's location and use case: flexible sealants for exterior slabs that see temperature swings, and semi-rigid epoxy fillers for interior floors like garages and warehouses that need a hard, forklift-rated joint that won't compress under load. The right filler matters as much as the application. A flexible sealant in a warehouse aisle will compress under forklift traffic and fail fast. A rigid epoxy filler on an exterior slab that sees real freeze-thaw cycles will crack out within a season. Matching the material to the environment is the difference between a repair that lasts years and one that needs redoing next spring. Why This Matters Before Any Coating or Overlay If you're planning an epoxy floor, a stained concrete finish, or an overlay , joint filling isn't optional — it's a prerequisite. Any coating applied over a failing or unfilled joint will crack right along that same line, because the movement the joint was designed to control hasn't gone anywhere. We check joint condition on every resurfacing assessment we do, for exactly this reason. Get Your Joints Assessed Whether it's a residential driveway with a few cracked joints or a commercial warehouse floor overdue for a full joint survey, Zachary Daniel Concrete handles crack and joint filling across Greenville, Simpsonville, Mauldin, Easley, and the surrounding Upstate. Call Zach at (864) 770-8608 or request a free estimate online to get your slab assessed before small cracks turn into a bigger repair.
September 9, 2026
One of the most common questions we get from business owners and homeowners in Greenville, Greer, Spartanburg, and across the Upstate is a simple one: how long is this going to last? It's the right question to ask. Polished concrete is a significant investment — more upfront than VCT, roughly on par with mid-range tile — and the whole justification for choosing it is that it lasts longer and costs less over time. If you can't trust the lifespan claim, the math doesn't work. Here's the honest answer for our specific climate, broken down by what actually determines how long a polished concrete floor holds up in the Upstate. The Real Numbers: 10 to 25+ Years A properly installed polished concrete floor in South Carolina should last 15 to 25 years before any major renovation is needed — and in many cases significantly longer. That range covers most commercial and residential applications in the Upstate. The lower end of that range applies to high-traffic commercial spaces with heavy equipment, chemical exposure, and minimal maintenance. The higher end applies to well-maintained residential or light commercial floors with periodic re-burnishing and sealer refreshes. For context: VCT in commercial use typically needs full replacement at 7-12 years Ceramic tile in commercial use typically shows significant wear and grout failure at 8-15 years LVP in commercial use typically needs replacement at 5-10 years Polished concrete outlasts all three — sometimes by a wide margin But lifespan isn't uniform. What you actually get depends on the system level, how the floor is used, and how South Carolina's climate interacts with both. What Upstate SC's Climate Does to Polished Concrete The Upstate isn't the easiest climate for any flooring system. A few factors that specifically affect polished concrete here: Humidity and Moisture Vapor Greenville and the surrounding Upstate run high ambient humidity for most of the year. For polished concrete, the primary concern is moisture vapor transmission through the slab — especially for below-grade spaces like basements and ground-level industrial floors. Slabs that weren't densified properly are more porous and more susceptible to moisture interaction over time. A properly densified slab handles Upstate humidity without issue. A slab that was ground but not densified — or densified lightly — will absorb more moisture over time and lose hardness faster. Thermal Cycling South Carolina's combination of hot summers and mild but real winters creates thermal cycling — the slab expands and contracts with temperature changes. This is more pronounced near exterior doors, loading docks, and uninsulated spaces. Over years, thermal cycling can open micro-cracks or stress existing crack repairs if the floor wasn't properly prepared. The fix is correct crack repair before polishing — and not filling after. We see floors crack through patched areas within a few years when the repair was done in the wrong sequence. Heat and UV in Certain Spaces Upstate summers put significant heat load on south-facing and western-facing floors near large windows. This matters more for the sealer than the polish itself — the wrong sealer breaks down under UV and heat cycling, leaving the surface unprotected. The right sealer, matched to the exposure level, holds up without issue. What Wears First — and When Polished concrete doesn't fail all at once. It ages in a sequence, and understanding that sequence helps you maintain it correctly: Years 1-5: Floor looks essentially new. Minor scuffing from foot traffic. No maintenance needed beyond regular cleaning. Years 3-7: Topcoat or guard layer begins to lose its initial sheen in high-traffic zones — entrance areas, aisles, pivot points. This is cosmetic and normal. A burnish with a high-speed floor machine restores the sheen. Not a failure, just normal wear. Years 5-10: On heavily trafficked commercial floors, the guard layer may need refreshing. Still not a structural failure — a topcoat refresh is fast and inexpensive compared to floor replacement. Years 10-15: On a properly installed floor, the densified concrete itself is still solid. What's aging is the surface protection layer. A re-seal and re-guard at this point can realistically extend the floor's life another 10-15 years. Years 15-25+: Well-maintained floors often still look good at this range. A floor that received a re-seal around year 10 and regular burnishing is performing as intended. The pattern we see most often: a floor that looks "failed" at year 8 is actually a floor that was never re-burnished after year 3. The concrete is fine. The guard is worn. That's a maintenance issue, not a product failure — and it's fixable without replacing the system. What Actually Determines Your Floor's Lifespan 1. Quality of Densification Densification is the chemical process that hardens the concrete surface and reduces porosity. Done correctly, it's what makes polished concrete harder than the original slab. Done lightly or skipped, the floor wears faster, stains more easily, and is more susceptible to moisture. Our commercial concrete polishing work always includes proper densification as a non-negotiable step. It's what the long lifespan claims are actually built on. 2. Sealer Selection for the Environment Interior sealer on a floor near skylights or large south-facing windows will break down faster than a UV-stable sealer specified for that exposure. A standard guard on a warehouse floor with forklift traffic will wear faster than a heavy-duty guard spec'd for that use. Matching the sealer to the actual environment is where a lot of lifespan variation comes from. 3. Maintenance Frequency Polished concrete doesn't need much maintenance — but it needs some. Auto-scrubbing regularly (vs. mopping with dirty water), burnishing when the sheen starts to dull, and addressing spills quickly all extend lifespan significantly. The same floor installation will perform very differently at year 10 in a well-maintained facility vs. one that ignores the floor entirely. 4. Traffic and Use A polished concrete floor in a Greenville retail showroom will look better at year 15 than the same floor in a Spartanburg distribution center with 50 forklift passes per day — even with identical installation quality. Higher-traffic and higher-abuse applications need more maintenance touchpoints to hit the same lifespan. When to Re-Seal vs. When to Refinish vs. When to Redo Knowing which intervention is right saves money and extends the floor's useful life: Re-seal / re-guard (every 5-10 years depending on traffic) — restores stain protection and sheen. Fast, inexpensive, no grinding required. Re-burnish (every 1-3 years in commercial, as needed in residential) — restores gloss in worn areas using a high-speed floor machine. No product application needed. Light refinish (after 10-15 years in heavy use) — re-grind the top layer lightly, re-densify, re-seal. More involved than a re-seal but far cheaper than a full redo. Full system redo (15-25+ years, or after significant damage) — grind back to bare concrete and start fresh. At this point the floor has likely earned its cost many times over. Our floor restoration work covers all four levels — from a quick burnish to a full system redo, depending on what the floor actually needs. How ZDC Thinks About Lifespan in the Upstate We've polished floors in Greenville, Greer, Spartanburg, Mauldin, Simpsonville, and Travelers Rest, and we've seen what holds up and what doesn't over years of real Upstate use. The floors that last the longest share three things: they were densified properly, they were sealed for their specific environment, and they received periodic maintenance instead of being ignored until they looked bad. When we quote a polishing project, we're specific about the densifier, the guard system, and the maintenance program — because those three things determine whether the 15-25 year lifespan claim is real for your floor or just a marketing number. Get a Free Estimate for Your Upstate Floor Give Zach a call at (864) 770-8608 or reach out through our contact page . On-site consultations are free across Greenville, Greer, Spartanburg, Mauldin, Simpsonville, and the broader Upstate. We'll walk the slab, talk through the spec, and give you a realistic picture of what to expect.
September 2, 2026
Basement floor projects in Greenville are almost always driven by the same moment: the homeowner finally decides to finish the space, or they're tired of looking at a gray slab that stains every time it rains, or they've watched a neighbor's basement epoxy peel up within two years and want to know how to avoid the same outcome. Basement epoxy is one of the most popular residential concrete projects we do across Greenville, Greer, Mauldin, Simpsonville, and the surrounding Upstate. It's also one of the most commonly misunderstood. The work looks simple from the outside — roll some epoxy on the floor, done. But a basement slab in South Carolina has specific challenges that, if ignored, turn a good-looking floor into a peeling, bubbling mess within 18 months. Here's what every Greenville homeowner should understand before signing a contract for basement epoxy. Why Basement Slabs Are Different From Other Concrete Floors A basement slab sits below grade, which means it's surrounded by soil on three sides. South Carolina's climate — high humidity, significant rainfall, and warm soil temperatures for most of the year — means moisture is constantly present around and under that slab. That moisture doesn't just sit there. It moves. Moisture vapor rises up through the concrete and pushes against whatever coating is on the surface from underneath. If the coating isn't specified to handle that pressure — if moisture wasn't tested before install — the vapor has nowhere to go. It accumulates under the epoxy and eventually causes blistering, bubbling, and delamination. This is the single most common failure mode for basement epoxy in the Upstate, and it's entirely preventable with proper testing and the right system spec. Step One: Moisture Testing Before Anything Else Before we quote any basement epoxy project, we test the slab for moisture vapor transmission. The standard method is a calcium chloride test or an in-situ relative humidity probe — both measure how much moisture vapor is moving through the concrete per day. If readings are high, we spec a moisture-mitigating primer before the epoxy system goes down. That primer creates a barrier between the rising vapor and the coating, and it's what separates a 10-year floor from a floor that fails in 18 months. If a contractor quotes your basement epoxy without mentioning moisture testing, that's a problem. Either they're skipping the step or they don't know it matters. What to Ask Every Contractor Before Signing Basement epoxy is a category where the price difference between quotes often reflects real differences in what's actually being installed. Here's what to ask: Do you test for moisture vapor transmission before install? — If no, walk away. This is non-negotiable for a below-grade slab in SC. What primer system are you using, and is it moisture-mitigating? — A vapor barrier primer costs more than a standard primer. Make sure the quote includes it if readings call for it. How are you preparing the surface? — Diamond grinding is the correct answer. Acid etching is the cheaper shortcut that produces weaker adhesion. What's the mil thickness of the base coat and topcoat? — Thicker coats = longer life. A quality residential basement system should have a minimum 10-12 mil total build. Thin-mil systems fail faster. What topcoat are you using? — A polyaspartic or aliphatic urethane topcoat is more durable and UV-stable than a standard epoxy topcoat. Matters especially near windows or walk-out basements with natural light. What's the warranty, and what does it actually cover? — Read the warranty carefully. Most exclude moisture-related failures unless a moisture-mitigating primer was specified — which means a contractor who skips the primer also skips the warranty coverage. Surface Prep: The Step That Determines Everything The coating is only as good as the bond to the slab. And the bond is only as good as the surface preparation. For basement epoxy, proper prep means mechanical diamond grinding — using a grinder with diamond tooling to open the concrete surface, remove any contamination, and create the profile that lets the epoxy bond mechanically to the slab. It also means repairing cracks and spalls before coating, not after. The shortcut some contractors take is acid etching — applying muriatic acid to the slab instead of grinding. It's faster and cheaper, but it produces a weaker surface profile and doesn't remove oil contamination or old coating residue the way grinding does. Acid etching on a basement slab also interacts poorly with moisture issues that are already present. Our epoxy flooring work — whether garage, basement, or commercial — always starts with diamond grinding. We don't cut that corner because it's the corner that determines whether the floor lasts. Choosing the Right System for Your Basement Not all basement epoxy looks or performs the same. The main options for Greenville homeowners: Solid Color Epoxy Clean, uniform look. Good for utility basements, storage areas, or gym spaces. Usually the most budget-friendly option. Runs $4 to $7 per square foot for a quality system on a prepared slab. Full Broadcast Flake System The most popular choice for finished basement living spaces. Multi-color vinyl flake broadcast into the wet base coat, sealed with a clear urethane topcoat. Hides minor surface imperfections better than solid color, adds texture for slip resistance, and holds up to real family use. Runs $6 to $10 per square foot for a quality system. Metallic Epoxy High-end, dramatic look — swirling, liquid-like finish in custom colors. Popular in finished basements being used as home theaters, bars, or entertainment spaces. Runs $8 to $12 per square foot . Requires more skilled application than flake systems. For a typical Greenville basement between 500 and 1,000 sq ft, most quality epoxy projects land between $3,500 and $8,000 depending on the system, slab condition, and prep required. Walk-Out Basements and Daylight Basements: One More Variable Walk-out basements and daylight basements in the Upstate get direct sunlight on part of the floor. Standard epoxy yellows under UV exposure — sometimes within a year. For these spaces, a polyaspartic or UV-stable aliphatic urethane topcoat is required, not optional. It costs slightly more but is the difference between a floor that looks good at year 5 and one that's yellowed and chalky by year 2. Our concrete coatings specs always account for UV exposure when it's a factor in the project. Common Basement Epoxy Failures We Get Called to Fix Peeling within 12-18 months — almost always moisture vapor that wasn't tested for or addressed Bubbling or blistering — same root cause: moisture pushing up under a coating that wasn't rated for it Adhesion failure at edges and seams — inadequate surface prep, usually acid etch instead of grind Yellowing near windows — standard epoxy topcoat on a daylight or walk-out basement Thin coating wearing through in high-traffic areas — under-spec'd mil thickness, wrong product for the use Every one of these failures is preventable. And every one of them we've seen from a prior contractor on a basement we were called to redo. How ZDC Approaches Basement Epoxy in Greenville We test the slab first, every time. We grind instead of etch. We specify moisture mitigation when readings call for it. We use topcoat systems matched to the environment — UV-stable for daylight basements, standard urethane for fully below-grade spaces. And we give you a written spec that tells you exactly what's going in, so you can compare it against any other quote you get.  Get a Free Estimate for Your Greenville Basement Give Zach a call at (864) 770-8608 or reach out through our contact page . On-site consultations and moisture testing are free across Greenville, Greer, Mauldin, Simpsonville, Travelers Rest, and the broader Upstate.
September 1, 2026
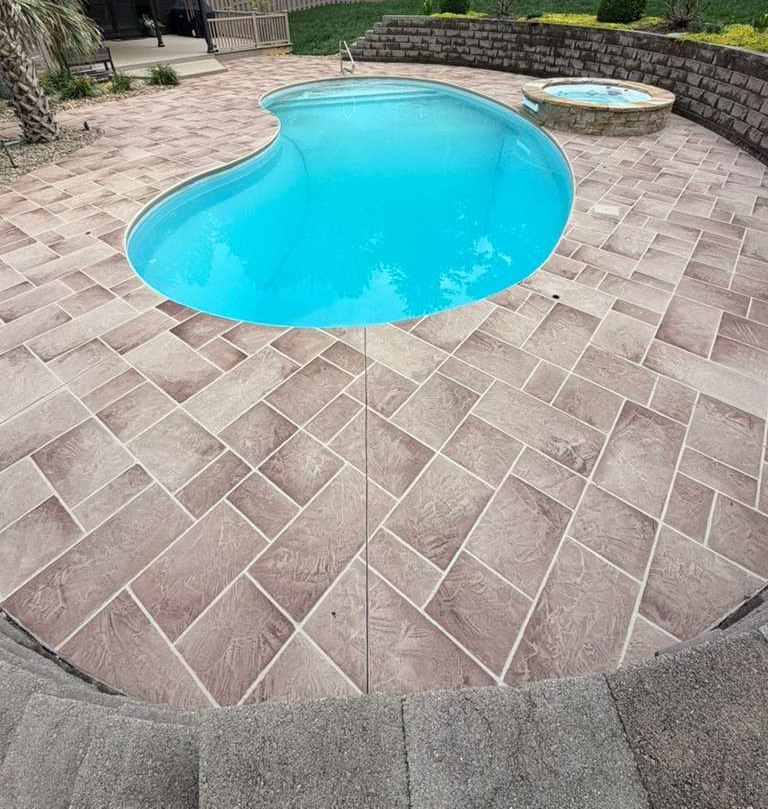
See what stamped concrete overlays look like: stone, brick and wood patterns over your existing patio, driveway or pool deck in Greenville, SC.
August 26, 2026
If you're a Greenville homeowner looking at finishing a concrete floor — garage, basement, patio, or main-floor living space — you've probably run into two opciones over and over: concrete staining or epoxy coating . Both take a plain gray slab and turn it into a finished floor. Both are durable. Both are common. And they're not the same product at all. Which one is right for your space depends on where the floor is, what it has to handle, how you want it to look, and how much you want to spend now vs. later. Here's how we walk Greenville homeowners through the decision. What Each One Actually Is The two systems get lumped together as "finished concrete," but they work completely differently. Concrete staining adds color to your existing slab and seals it. The concrete stays concrete — we grind the surface, apply acid stain or water-based stain to add color, and finish with a clear sealer. The result is a colored, sealed concrete floor with the texture and character of the original slab showing through. Epoxy coating is a separate material applied over the slab. Multi-layer system: primer, base coat, optional flake or metallic effect, and a clear topcoat. The epoxy sits on top of the concrete as a continuous film. What you see is the coating, not the slab underneath. That difference — dyed concrete vs. a coating on top — shapes every other comparison. Durability: What Actually Holds Up Both systems are durable, but they're built for different kinds of abuse. Concrete staining is essentially indestructible where it counts — you can't scratch through it because there's no coating to scratch through. Sealer wears over time, but the color underneath doesn't go anywhere. The worst case is usually re-sealing every 3-5 years to keep the sheen and stain protection intact. Epoxy is harder-wearing in the short term. A good residential epoxy system resists impact, chemicals, and moisture better than a sealed stained floor. But epoxy also fails more visibly when it fails — chips, hot tire pickup, delamination, or yellowing. A worn stained floor still looks like a stained floor. A worn epoxy floor looks like it needs to be redone. For garages with hot tire traffic, oil spills, and dropped tools, our garage floor epoxy coating is the more common recommendation. For interior living spaces and patios, staining usually wins. Maintenance: What You'll Actually Do Stained concrete is the lower-maintenance long-term winner. Damp mop for daily cleaning, re-seal every few years. That's it. No wax, no re-coating schedule, no tricky spot repairs. Epoxy is also low-maintenance day-to-day, but the topcoat is a wear layer. In a busy garage or a heavily-used basement, the topcoat may need refreshing every 5-8 years to keep the floor looking new. It's not expensive to refresh — but it's a recurring cost that staining doesn't have. If your goal is "finish it and forget it," staining edges ahead. If your goal is "maximum toughness against garage abuse," epoxy is worth the refresh cycle. The Look: Aesthetic Differences Very different visual results, even when they're the same color. Stained concrete has a natural, slightly mottled, layered look. You see the character of the original slab — trowel marks, aggregate variation, edges. Acid stain in particular creates a rich, marbled effect that looks organic and slightly different everywhere. Water-based stain is more uniform but still shows the underlying concrete. Epoxy is more uniform, more designed. Solid color, flake, metallic — the result looks intentional and manufactured (in a good way). Metallic epoxy creates a swirling, liquid-looking finish that's popular in modern garages and basements. You get exact color control that staining can't match. Neither is "better." A rustic patio with acid-stained concrete belongs. A sleek finished basement with metallic epoxy belongs too. The right pick depends on the aesthetic you want. Our concrete staining work covers acid and water-based systems in a wide color range for homeowners who want the natural concrete look elevated. Where Each One Wins by Room Garage Winner: epoxy in most cases. Hot tires, dropped tools, oil, and chemical spills favor a coating built to handle them. Full broadcast flake with a chemical-resistant topcoat is the standard. Staining is possible but usually doesn't hold up as well in a working garage. Basement Winner: either, depends on use. A finished basement living space works beautifully with stained concrete — softer look, warmer feel, easier to blend with the rest of the home. A basement workshop or storage area often does better with epoxy for the chemical and impact resistance. Patio and Outdoor Concrete Winner: staining, almost always. UV exposure destroys most epoxy topcoats over a few years — yellowing, peeling, chalking. Stained concrete with a UV-stable outdoor sealer handles direct sun without breaking down. This is the clearest case in the whole comparison. Main-Floor Living Space Winner: staining or polish. Interior living spaces call for a look that reads as intentional and warm. Staining paired with a satin sealer, or polished concrete with dye, are the go-to systems. Epoxy in a living room or kitchen usually looks too shiny and too industrial. Laundry Room, Mudroom, Utility Areas Winner: epoxy. Wet feet, cleaning chemicals, salt from winter shoes, dropped equipment — epoxy handles all of it and stays easy to clean. Cost: What Homeowners Should Expect For most residential projects in the Upstate: Concrete staining — $3 to $7 per square foot depending on stain system and prep required Basic residential epoxy (solid color) — $4 to $7 per square foot Full broadcast flake epoxy system — $6 to $10 per square foot Metallic epoxy — $12 to $15 per square foot For a typical 400-500 sq ft garage or basement, that puts most stained-floor projects between $1,500 and $3,500, and most quality epoxy projects between $2,500 and $5,000. Metallic finishes and complex prep push higher. Common Homeowner Mistakes A few things we see homeowners get wrong when picking between the two: Buying a big-box epoxy kit for a garage floor — those DIY kits fail within 12-18 months under real garage use. Wrong product for the environment. Using stain on a slab with old paint or coating residue — stain won't bond properly to contaminated concrete. Prep is non-negotiable. Expecting stain to hide slab damage — stain shows what's underneath. If the slab is cracked or patched, staining will highlight it, not hide it. Epoxy is usually the better choice for a beat-up slab. Picking the wrong sealer for outdoor stained concrete — interior sealers fail under UV. Outdoor projects need outdoor-rated sealers exclusively. Our concrete sealing systems for stained floors are matched to the environment — interior, garage, or outdoor. How ZDC Helps Greenville Homeowners Decide We work on residential floors across Greenville, Greer, Mauldin, Simpsonville, and Travelers Rest, and we handle both stained and epoxy systems. We'd rather recommend the right one for your specific project than sell you the more expensive option — most homeowners end up with a mix across the house (stain for the patio, epoxy for the garage, polish or stain for the main floor). Get a Free Estimate for Your Greenville Home Give Zach a call at (864) 770-8608 or reach out through our contact page . On-site consultations are free across the Upstate. We'll walk your space, talk through both options, and send you a written estimate you can plan around.